Kitchen Renovation (and My New Cake Pantry!)
This post may contain affiliate links to products I recommend. I receive a small commission at no cost to you if you make a purchase using my link.
Hey you! Yes, you there. Do you like looking at other people’s houses?
I don’t mean peering in their windows (if you do that, you might wanna get some help), I mean either being invited into their home to see what they’ve done with the place, or checking out pictures of homes in fancy magazines, or on the interwebs.
If that does interest you, then there is a distinct possibility you may enjoy this post.
I won’t say that it’s quite up to the fancy magazine status, but since I can’t invite you all around to our house to see our new kitchen renovation, I thought this might be an ok compromise…
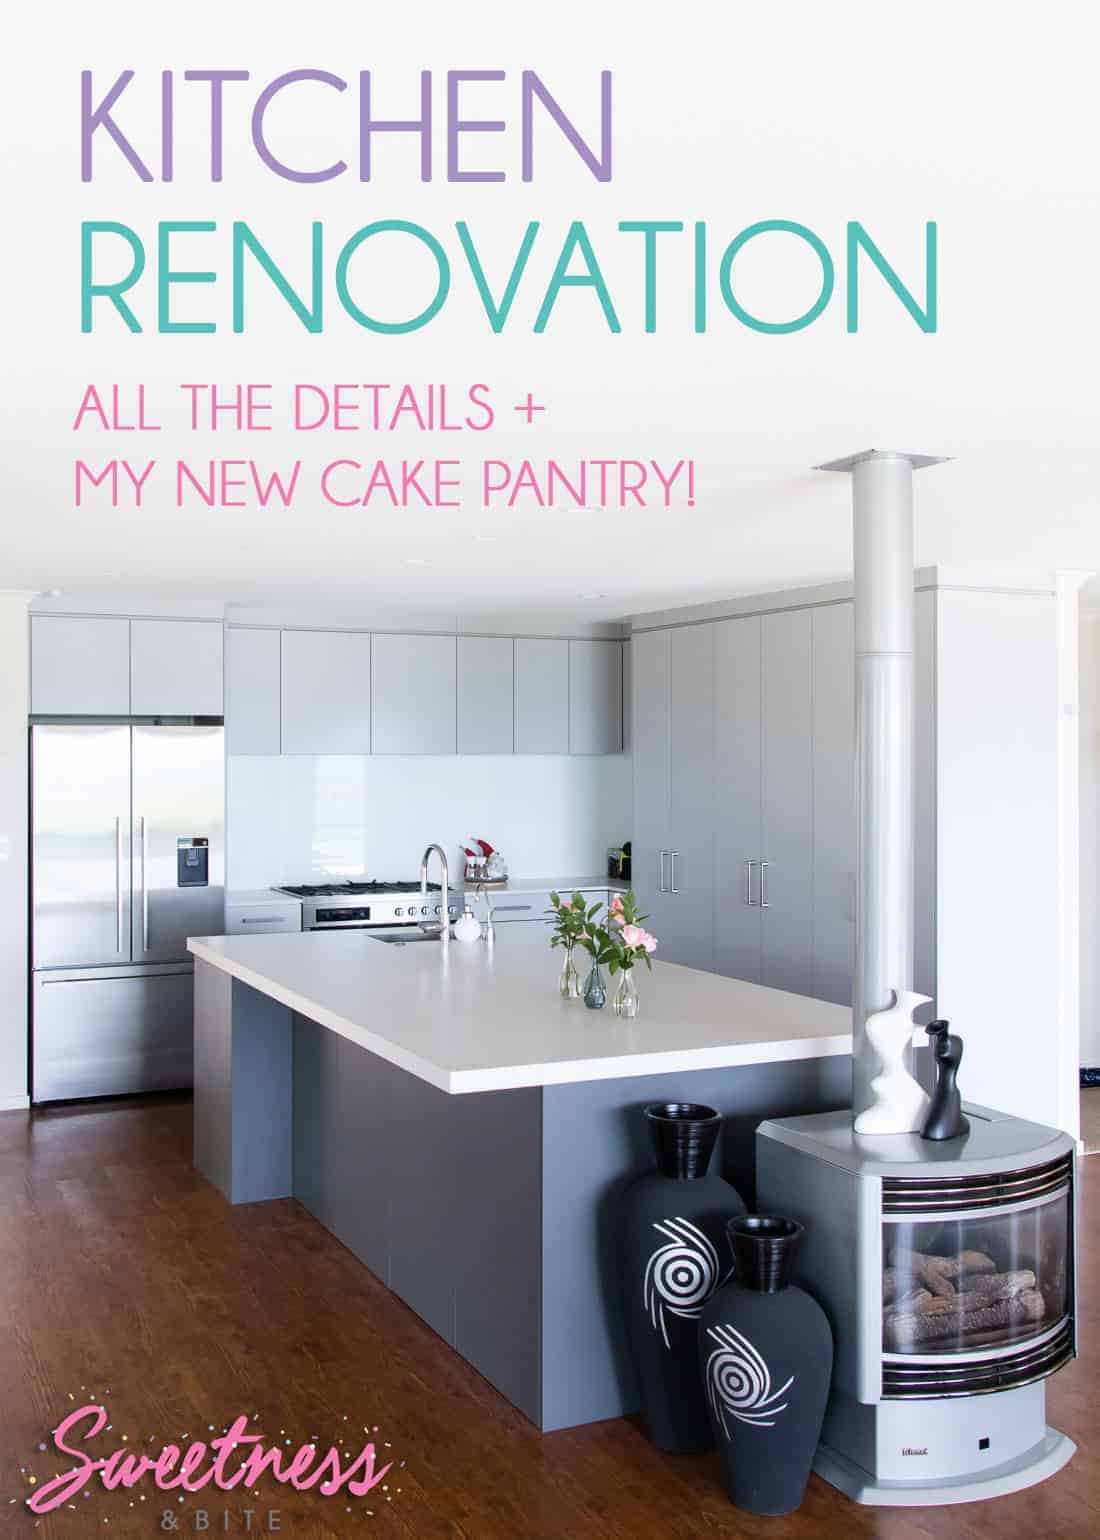
While I say “new”, the kitchen was actually finished by the end of last year, but I wanted to wait until we had organised where everything was going before I shared it. It may have also taken me a little while to organise my cake pantry.
Yes, I said Cake Pantry. If you’re on this blog for the cakes then you may not wanna miss that bit.
There aren’t too many times when I can say I’m really lucky for being unwell and having to live with my parents, but being able to have kitchen partially designed around what I need without having to pay for it myself isn’t something to complain about. And it was also a bit of a benefit for my mother because there were things she wanted that she could blame on me when justifying them to my father. Shh, don’t tell him we played him like that.
Just kidding, he knows.
Before I show you the pictures let’s just get this out there: I am no interiors photographer. I can take passable pictures of food, but taking them of interiors is not my forte. I did the best I could, so just bear with me.
Also, I’m telling you the brands of all the appliances and other products we used below, but I just wanted to mention no one is paying me to say how amazing they are, we literally do just love all of them and I figured I should tell you what they are in case you’re interested in getting them for your own kitchen.
So, let’s start with some “before” pics, shall we?
Before
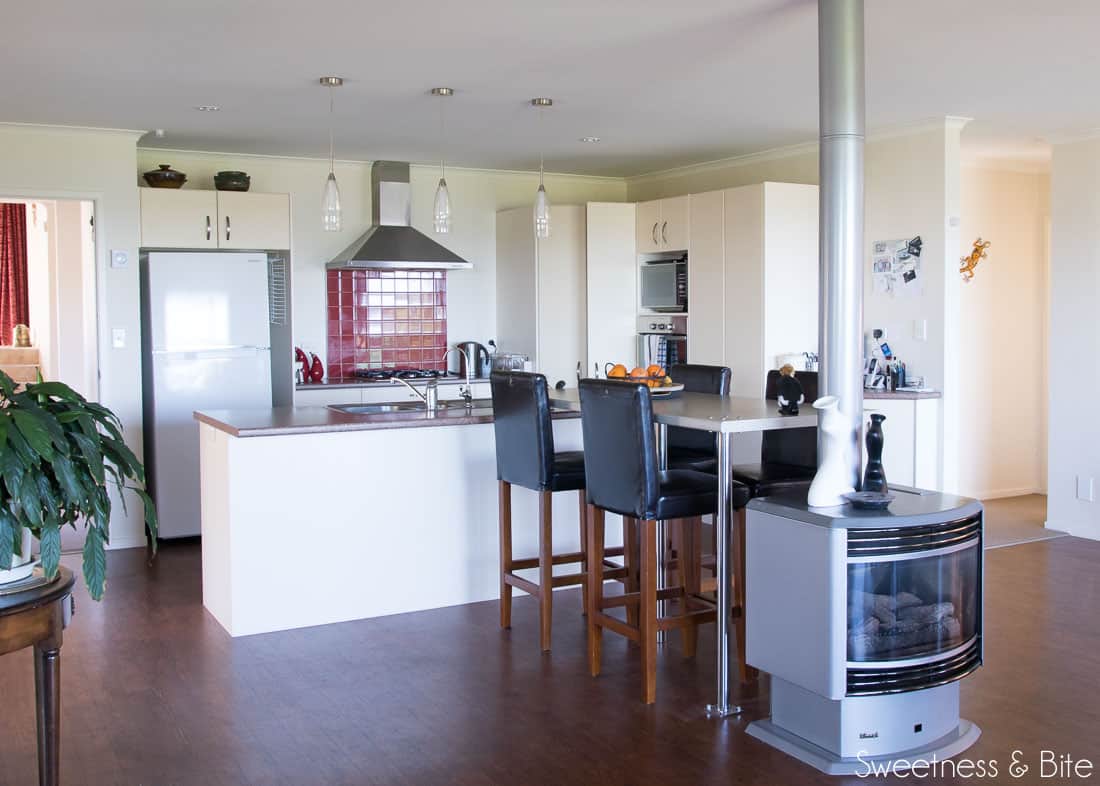
It wasn’t completely dreadful, but the main issue we had with this kitchen is the total lack of usable bench space. There was only a narrow bit of bench either side of the sink and even less either side of the stove. Mum and I usually cook dinner together, and I don’t know how many times we argued over bench space. It was a lot.
I made a grand total of one fondant-covered cake in that kitchen, and it was p-a-i-n-f-u-l. Rolling out fondant that needs to be larger than the available bench space is not enjoyable. Luckily it was a cake for my nephew that was supposed to look like the moon, so a little dodgy fondant wasn’t going to ruin the cake.
(Side note: if you’re wondering what the situation is in that room on the right in the picture above, that’s my studio/office, and I was sanding down my desk to paint when I took these ”before” photos)
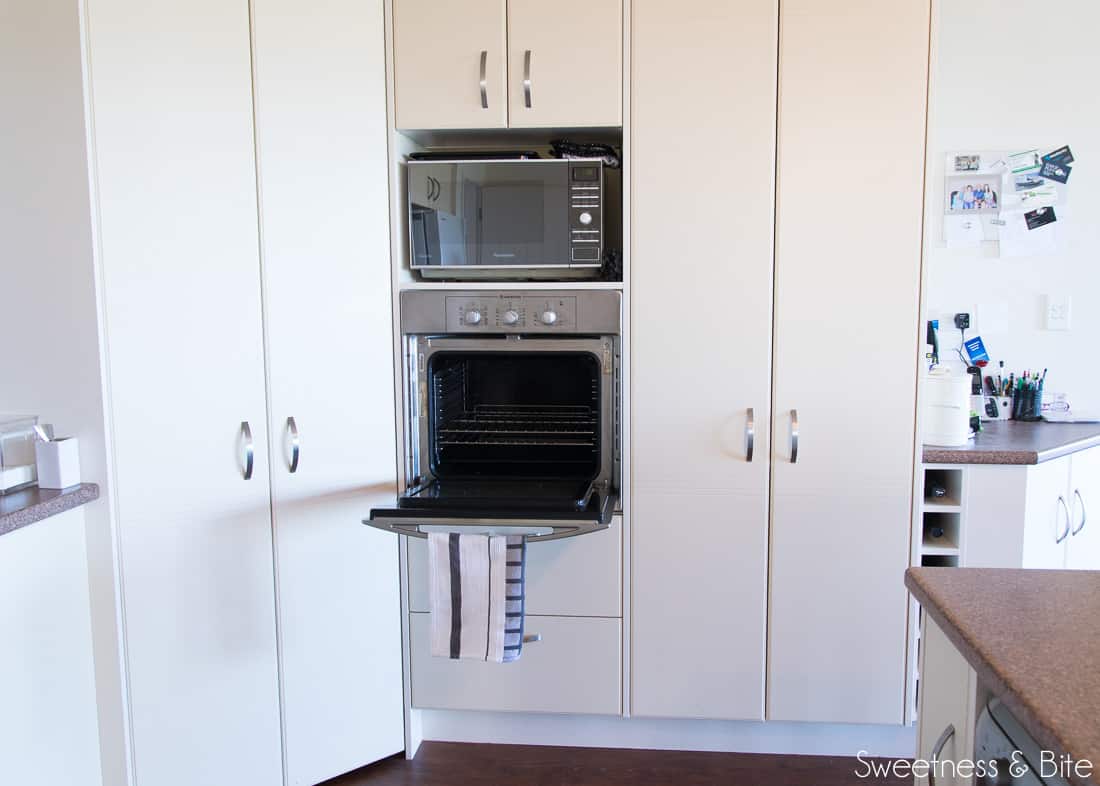
Other factors in the demise of this kitchen were the itty bitty oven, the gas hob that sent out the flames of Mordor every time I tried to light it and threatened to set fire to my face no matter how far back I was standing (somehow it didn’t hate other people as much. Maybe I insulted its mother or indeed stole its One Ring, but I don’t recall), those awful hanging pendant lights above the sink that were freakin’ hard to clean; and the almost unusable weird-height-and-angle “breakfast bar”.
Actually, that’s not totally true, we did use it… as a dumping ground storage area for random junk. It was too high to use as a bench (it was boob-height on a shorty-pants like me), and we’re not sit-at-the-breakfast-bar type people, so it really was just a place to leave stuff that we couldn’t be bothered putting away. Same deal with the old chairs we inherited from the previous owners, they just became shelves for the overflow of stuff from the breakfast bar.
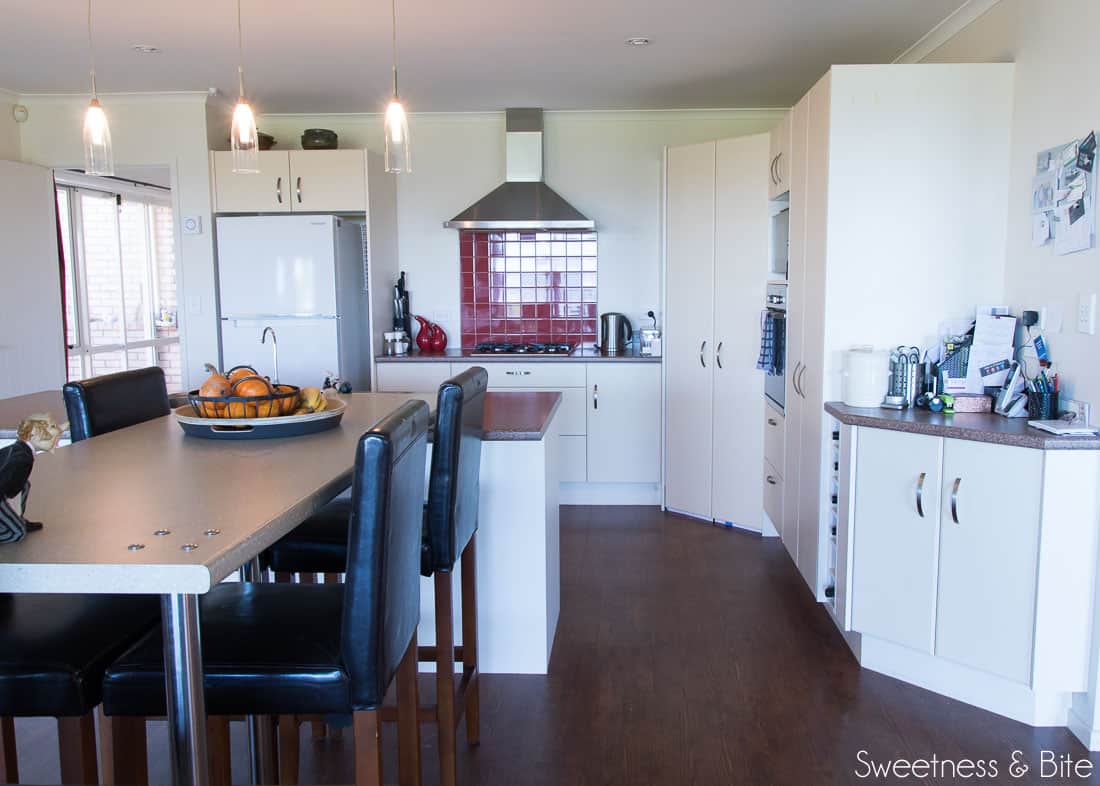
And last but certainly not least was the elephant in the room – the big ol’ gas heater right smack bang in the middle of the room, at the end of the breakfast bar. This was possibly the hardest thing to design around. The back of the heater is obviously pretty ugly, but moving the heater wasn’t an option, because a) hello $$$ and b) there isn’t really anywhere else to put it that would heat the whole open-plan living area.
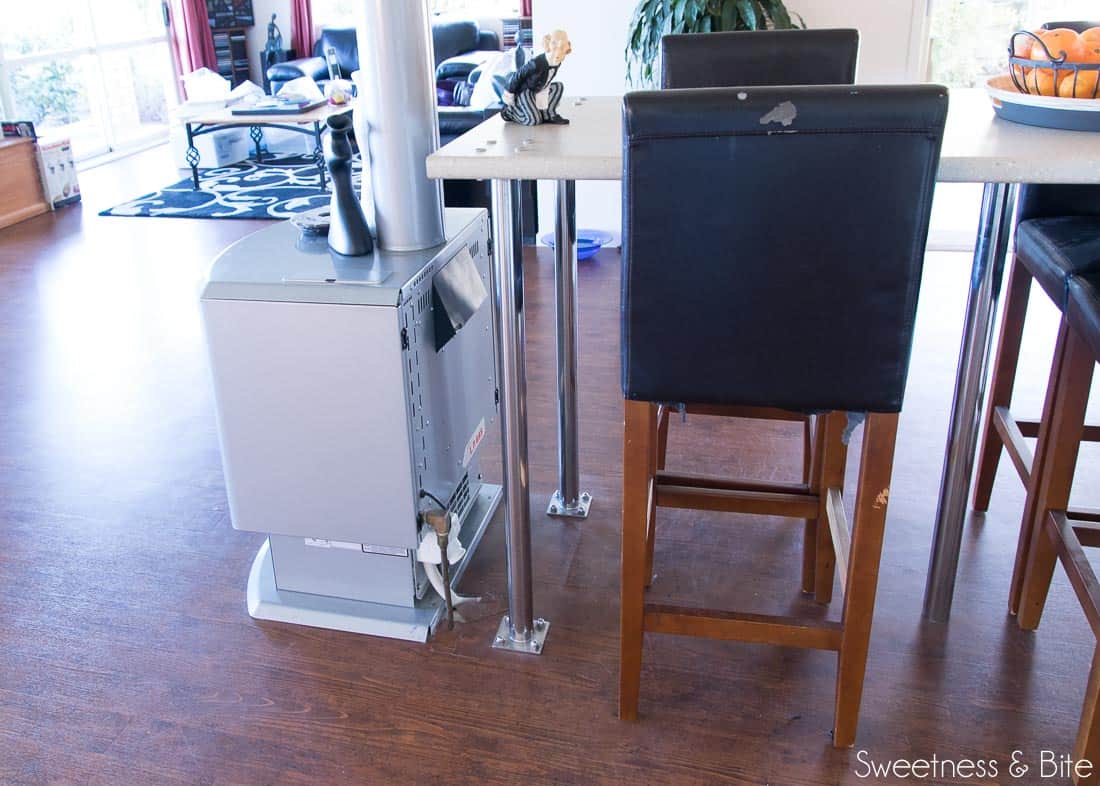
This is one of the reasons that the new island is so huge, with it ending right behind the heater it blocks most of the ugliness, as you’ll see below.
So you see, all in all, it wasn’t a completely dreadful kitchen, but not great for our needs.
The New Design
We worked with Chrissy from Mastercraft Kitchens Tauranga to redesign the kitchen. She was super patient with us, especially after Mum and I initially thought we’d like the oven moved to the other wall, and various other things moved around as well, and once the plans were drawn up we decided that actually, our idea was rubbish and we went completely the other way and kept most things roughly where they were.
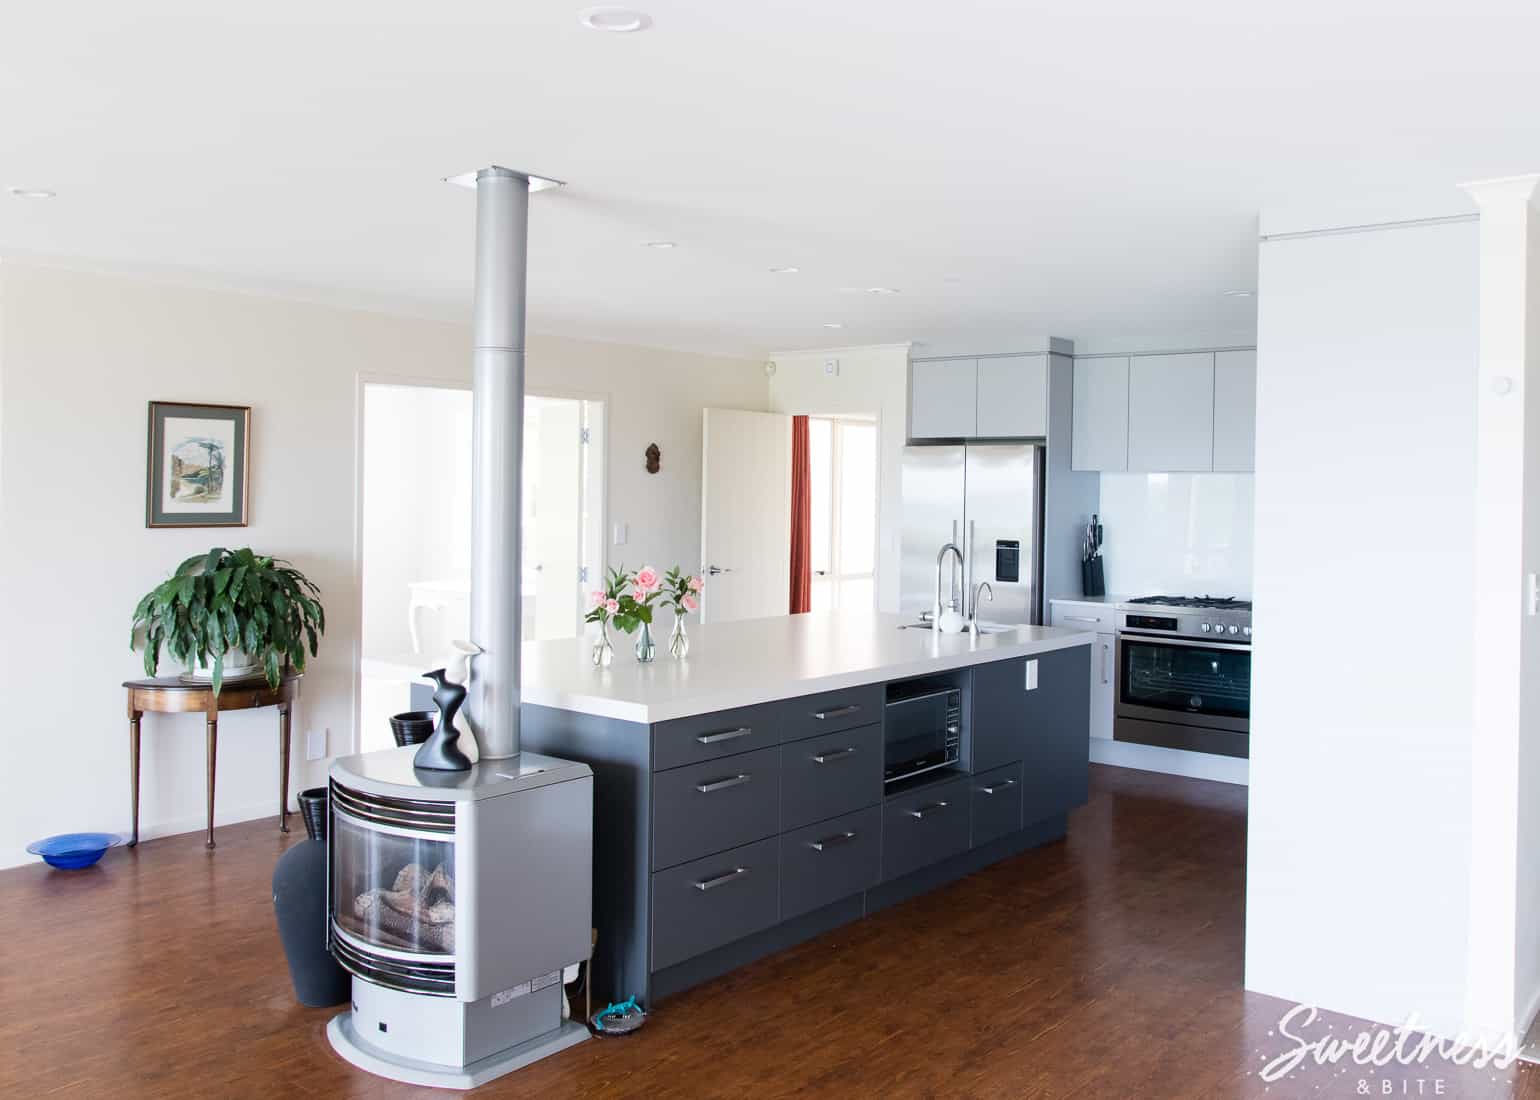
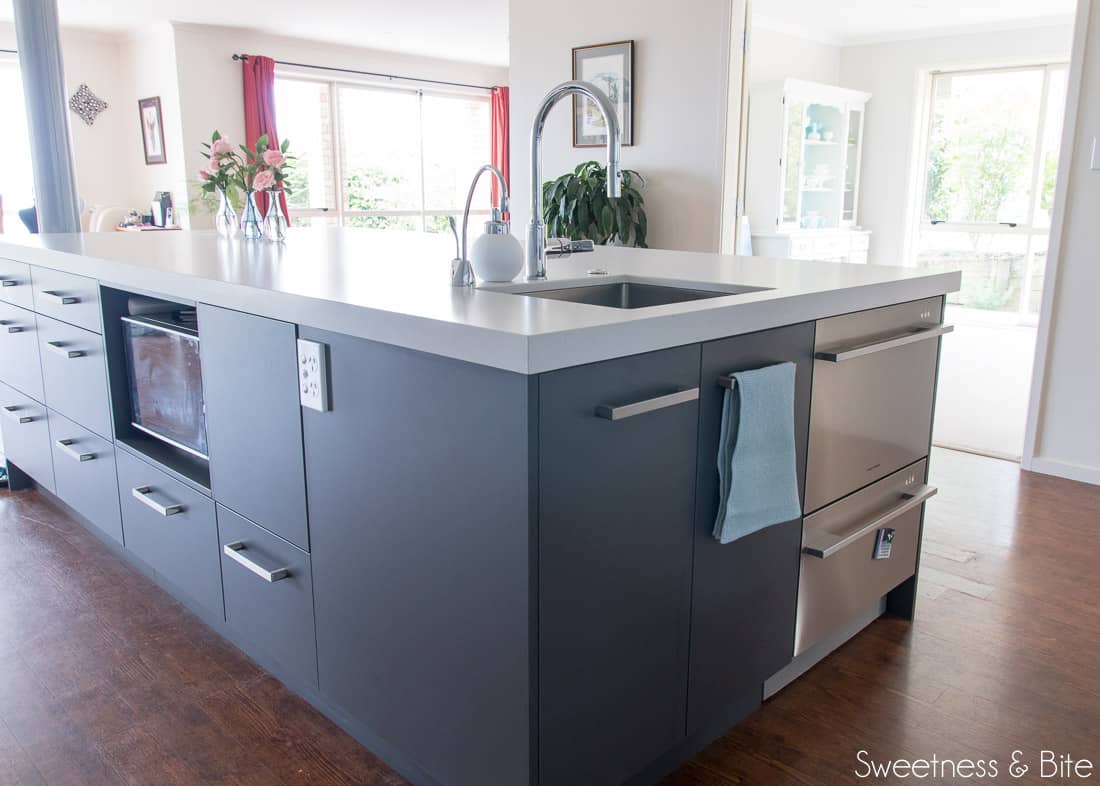
Obviously, the main feature of the kitchen is the HUGE island, after having the tiny island and weird breakfast bar, this island is the total opposite. It’s 1.4 metres wide and 2.8 metres long (4.6′ x 9.2′ – if my bad maths is correct). See, it’s pretty big. In fact, it would have been slightly wider, except that 1.4 meters was the maximum width available in the benchtop we chose.
One side has drawers, the microwave/convection oven and the rubbish bins…
…and the other side has large cupboards that were originally intended for some of my baking stuff, but eventually became storage for appliances, extra baking pans and food storage containers.
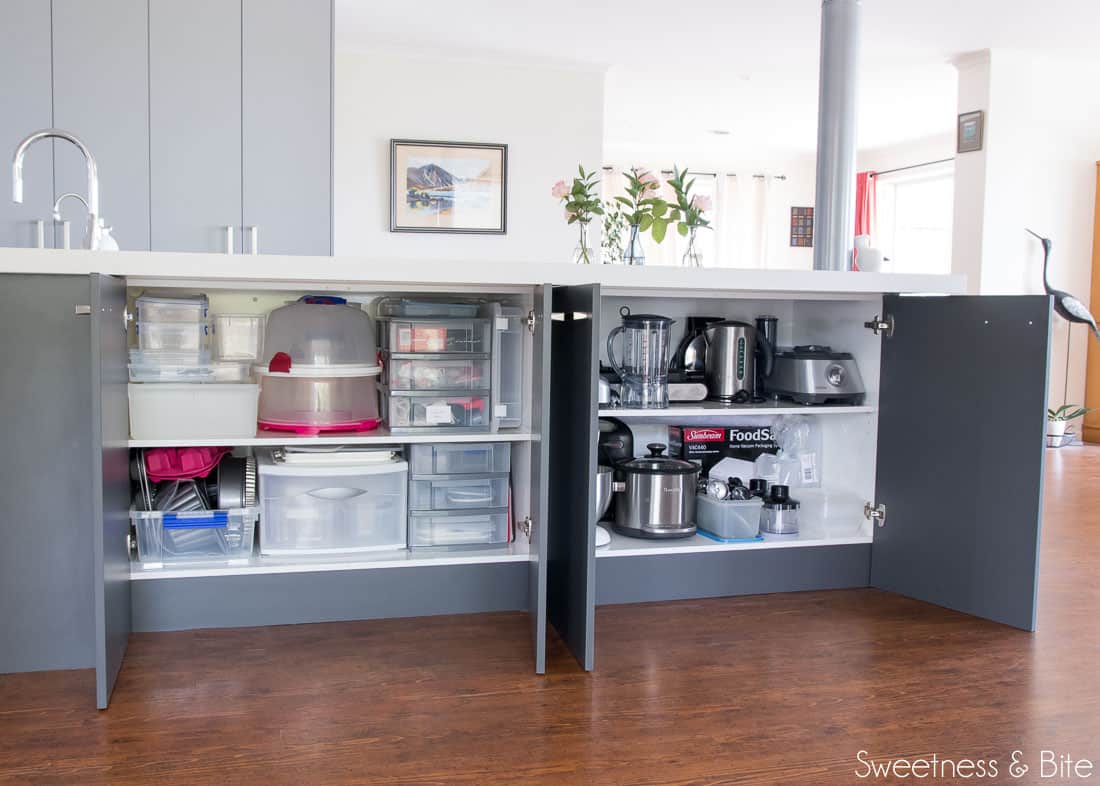
We decided to incorporate a slight ledge/breakfast bar type overhang on this side, so I can put a stool there to sit at when doing detailed cake decorating. At some stage, we will probably get a couple of proper bar stools to put there, but it hasn’t been high on the priority list so far.
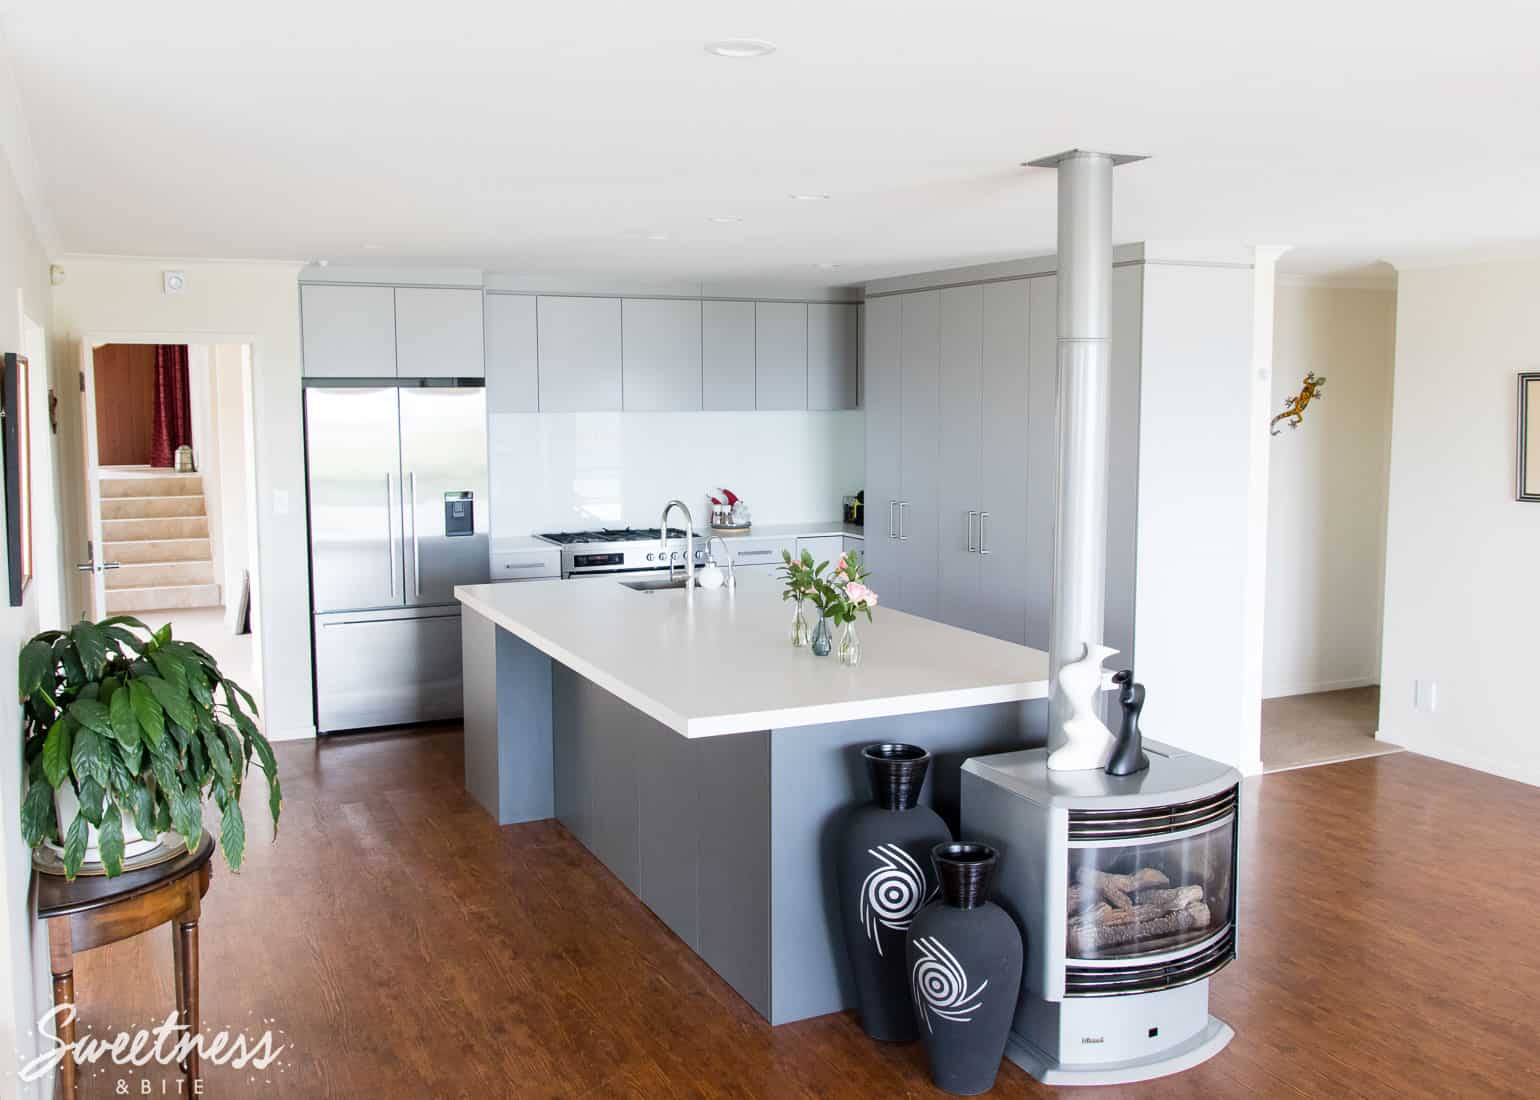
You may notice above the island that the pendant lights are gone, and were replaced with three more recessed LED lights.
The island ends just behind the heater, so most of the ugliness is hidden. We had hoped to put some kind of mantle and a bit of a box behind the heater to block it a bit more, but turned out not to be possible with the amount of venting area needed around the heater for safety.
The side wall of the kitchen has three large pantries – one for crockery and glassware…
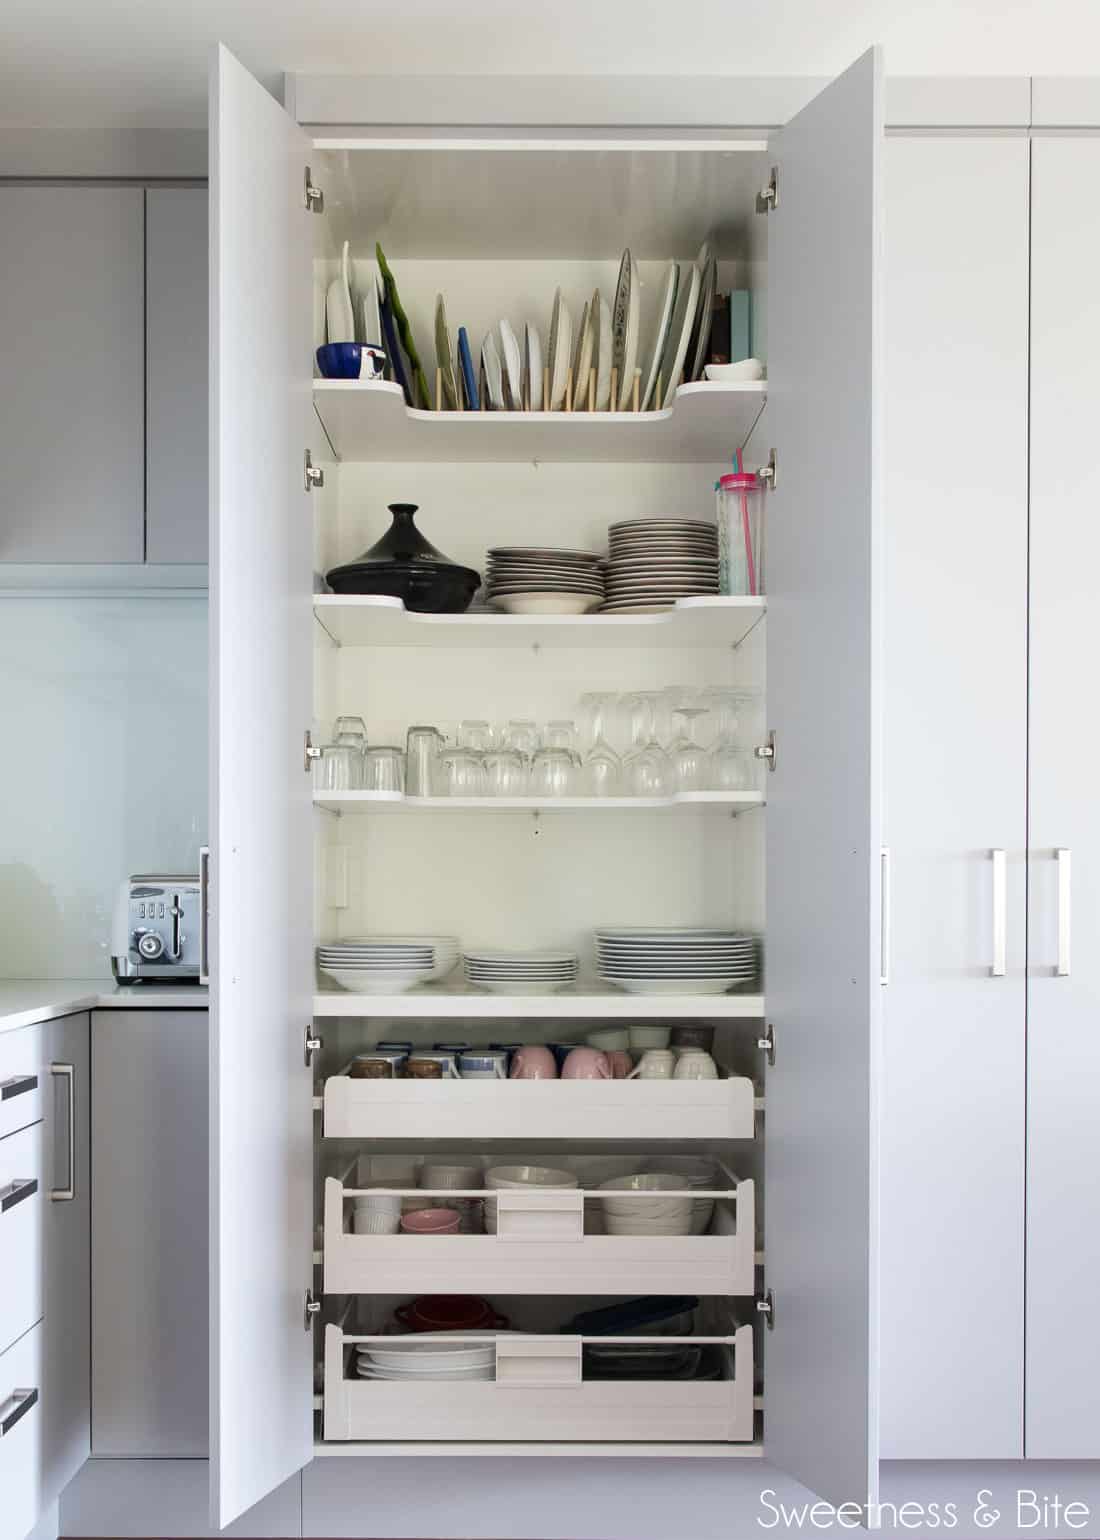
…one for food (which I’m afraid you don’t get to see because the day I took these pictures the pantry was a total mess *shudders*) … and one for my cake stuff, which you’ll see below.
Yes, I’m a tease. I know.
The cupboards are all melamine with a ‘velvet’ finish (not too textured so they’re easy to wipe clean) and have a mixture of handles, (most of the cupboards and drawers), no handles (above the stove) and push-to-open (the rubbish bin drawer – this is so awesome when you need to put something in the bin but your hands aren’t clean – you can shove the door with your hip and it pops open).
And in the convenience department, we’ve been loving this delightful contraption too…
Sometimes I spin it around just for fun.
Yeah, I know, I need another hobby.
The Appliances
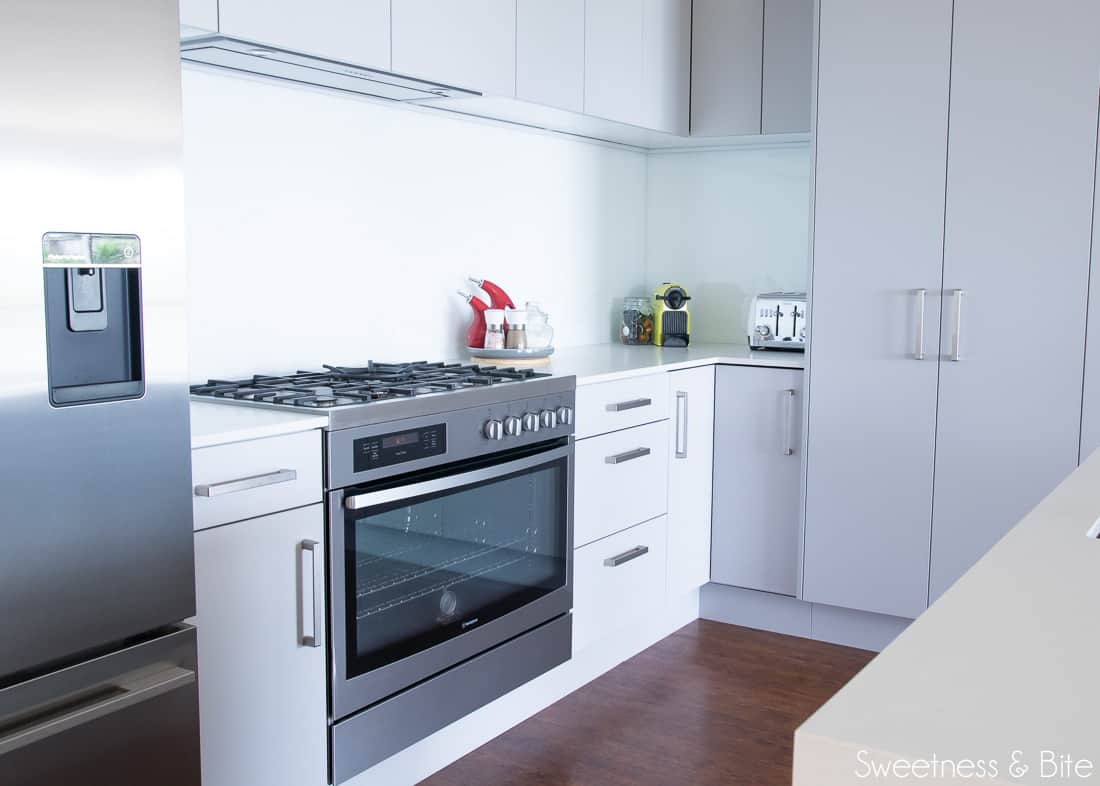
You can probably guess that one of my favourite additions to the kitchen is the oven. It’s a 900mm Westinghouse pyrolytic oven with a gas hob. We had an oven this size back in Wellington, and Mum and I have both missed it since moving. Going from being able to put five cakes on one oven shelf to barely fitting one or two was a bit of a shock to my baking system.
So far, it has proved to be a pretty darn good oven. It cooks and bakes really evenly and is pretty easy to use (although is it just me, or do oven manufacturers have an aversion to words and an unhealthy passion for symbols? On a digital display, is it really so hard to have “bake” or “grill” instead of symbols that may as well be hieroglyphics until you finally learn what they mean?!)
Best of all, the oven cavity is huge. We looked at a whole lot of different ovens, and so many of the 90cm wide ones actually had ridiculously tiny cavities once you opened the door to have a look. But this one has very little space wasted inside.
When the electricians took this baby out of the box to install her, I may have jumped up and down and clapped my hands like a small child about to eat an enormous ice cream. I was a bit embarrassed with myself. But I was excited. And she is wonderful.
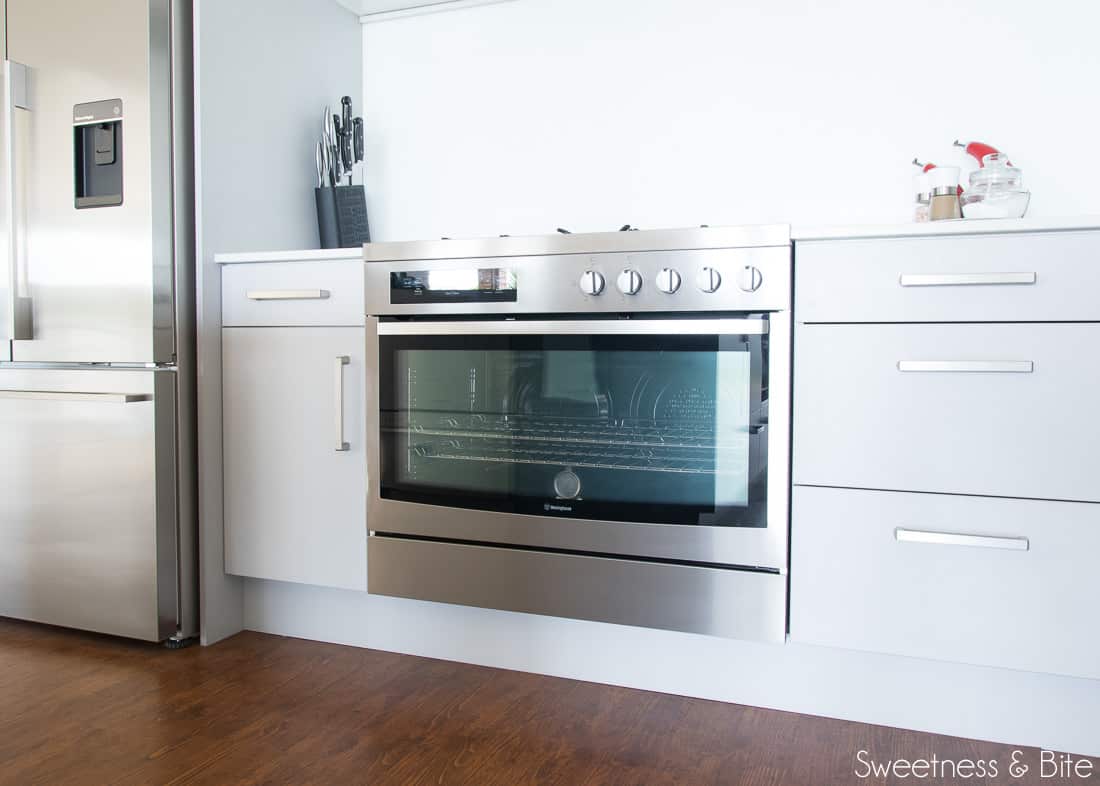
If you look closely in the oven photo you’ll see one of the oven thermometers that I always use because I don’t trust oven temperature indicators. Those are often inaccurate by 10+ degrees, which can really mess with your baking. But so far this oven seems to be pretty accurate and even in temperature.
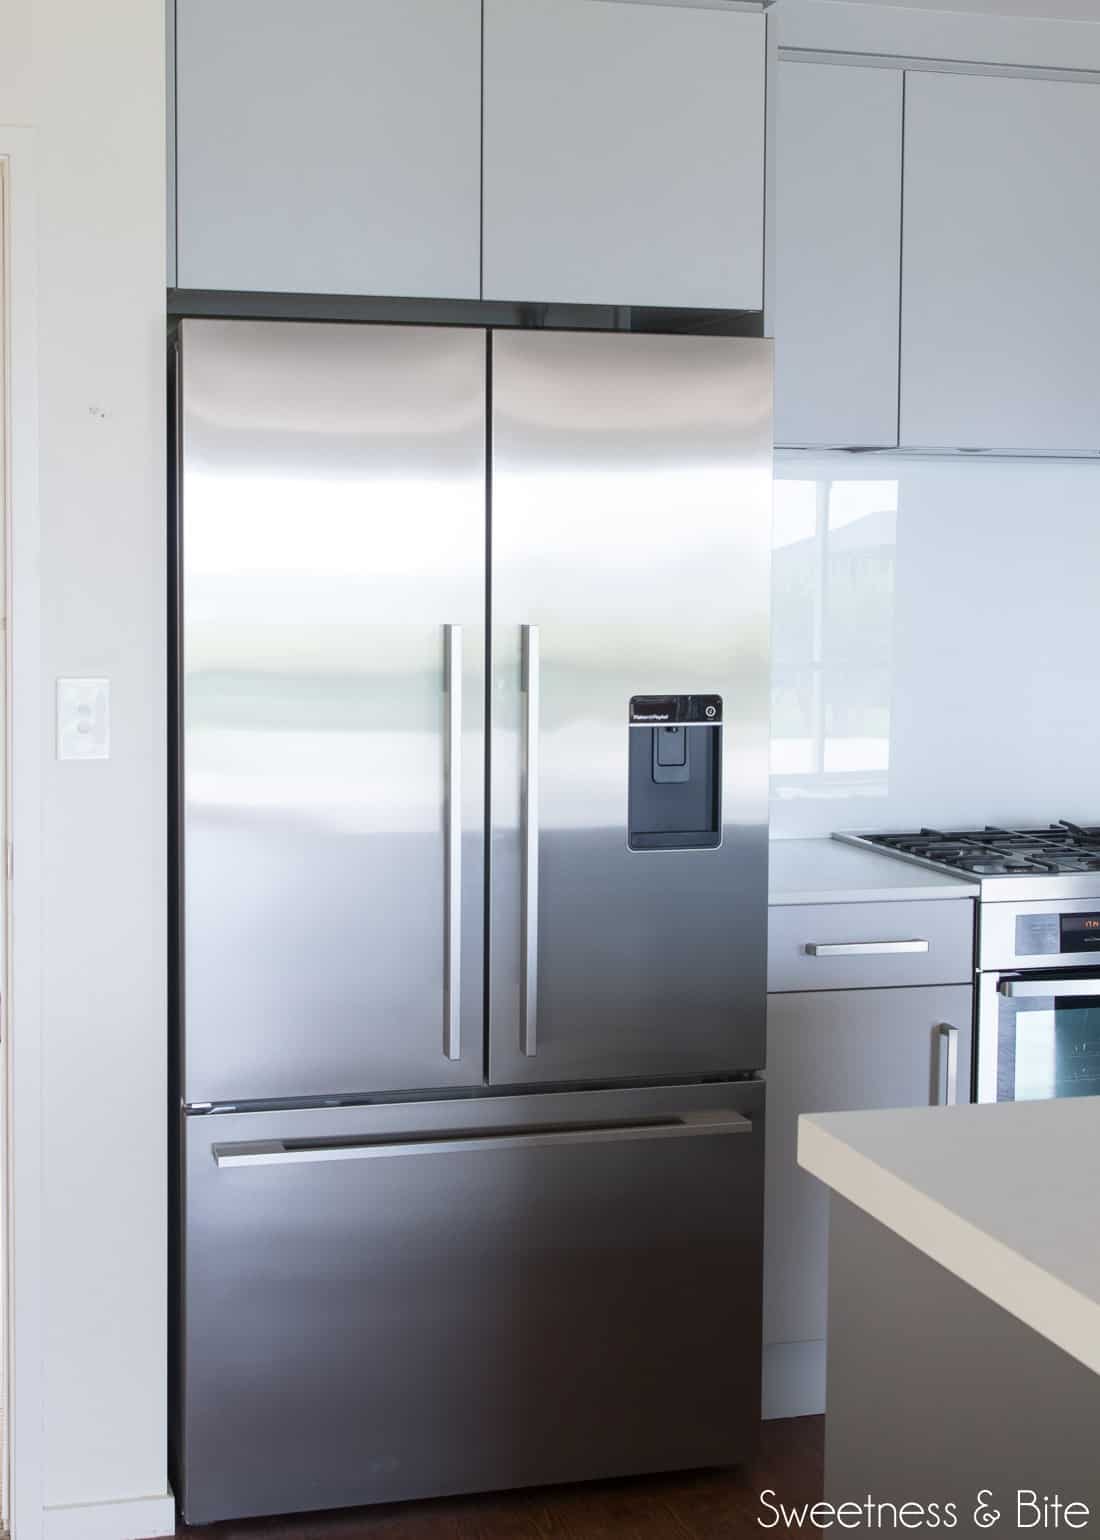
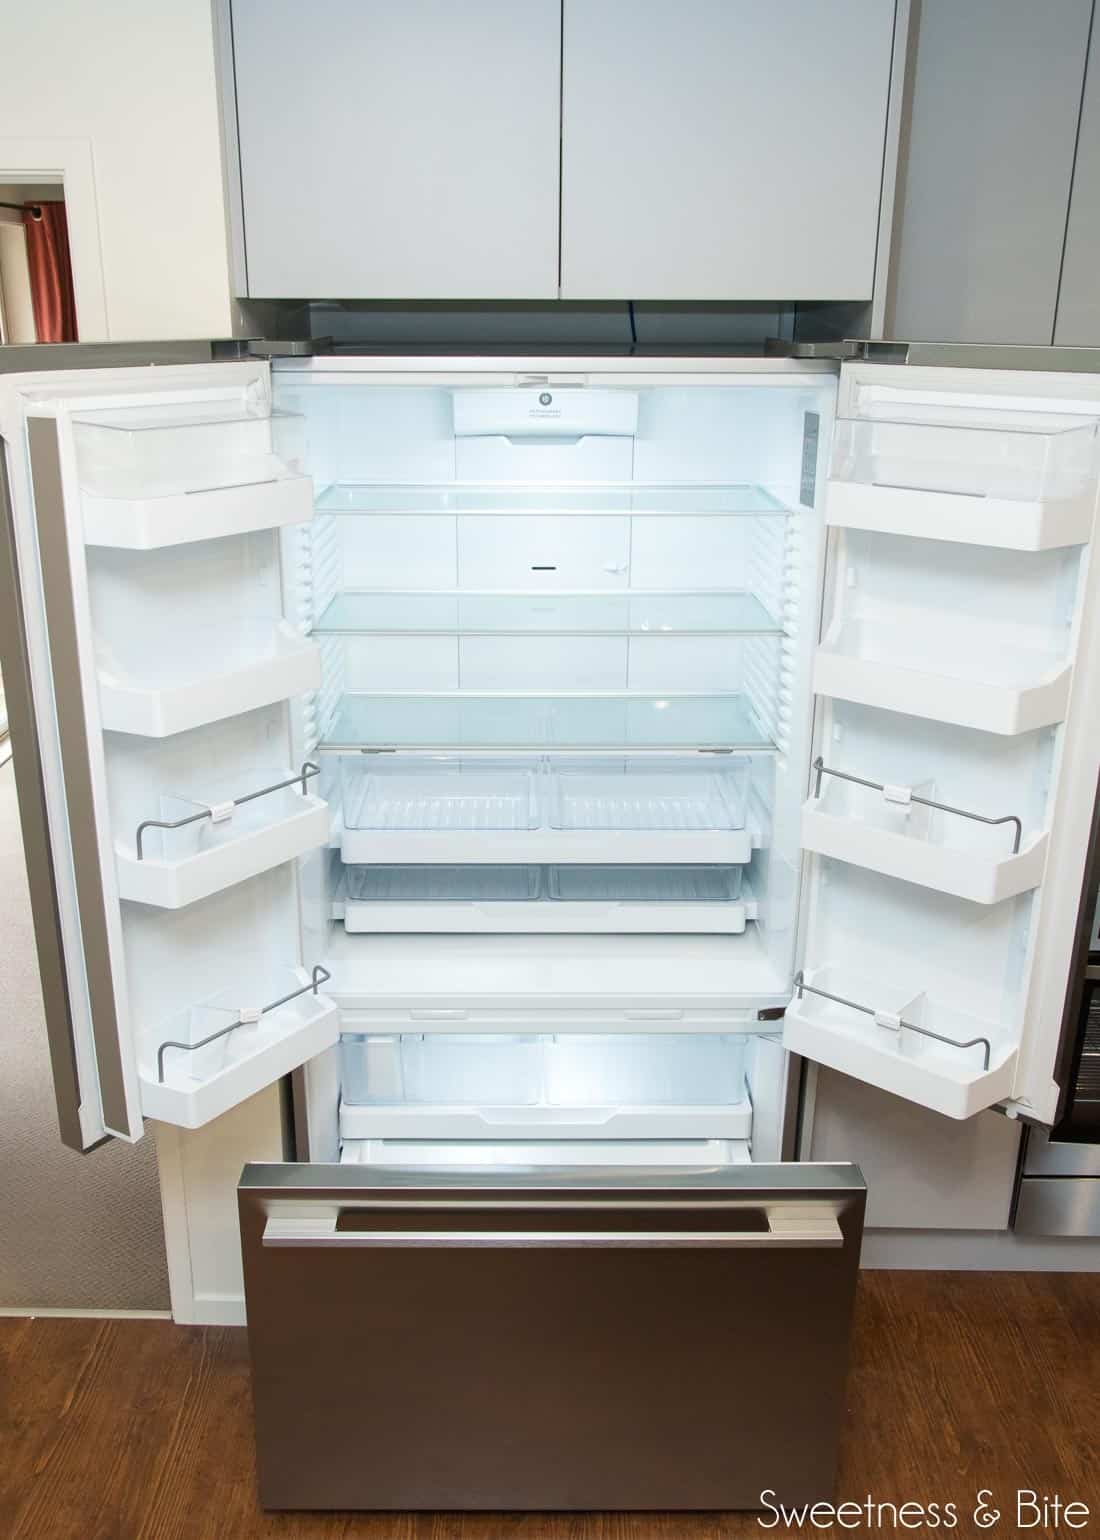
I was also rather excited about the Fisher and Paykel French door fridge – we had one of these in Wellington but couldn’t bring it with us because it wouldn’t have fitted in this kitchen before (plus these fridges are plumbed-in for the water filter and automatic ice-maker, and it seemed silly to take it with us) and we loved it so it was an easy choice to get another one.
The Fisher and Paykel Dish Drawer dishwashers were also another must-have, again we had these in Wellington too and they are brilliant. You can have one drawer washing and still be able to put dishes into the other drawer, which is particularly handy when I’m baking. Love ‘em.
And last but not least of the appliances is this little baby…
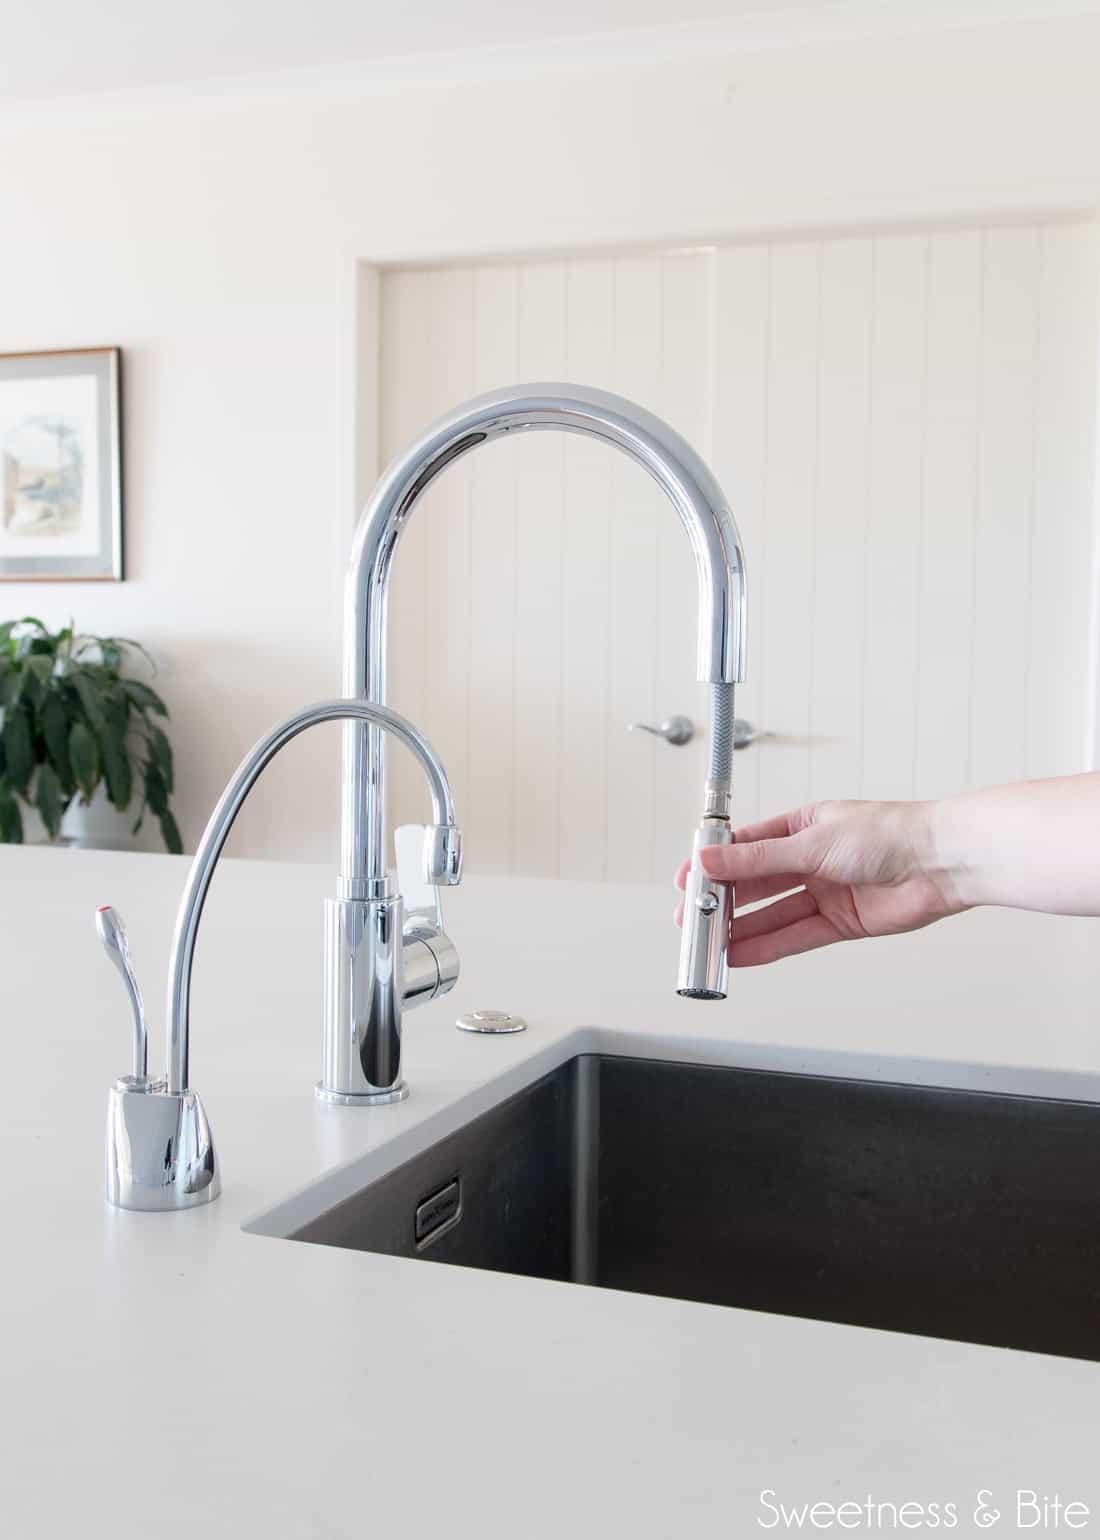
It’s actually not the tap I’m holding in this picture (that’s the handy hose attachment on the regular tap) but the little bitty tap next to it. This is an Insinkerator instant hot water tap, which gives you boiling (actually, almost-boiling) water on demand.
My friend Loralee put one of these in her new kitchen, and after staying at her house and using her tap, I coveted one. No waiting around for a kettle to boil when you need a cup of tea right now. Which is me, every morning, because I’m barely alive until I get my first cup of tea in me.
I wouldn’t suggest getting the exact one we have if you have kids in the house though, as it literally pours scalding water out as soon as you pull the lever. There are other models though that have a push-pull safety lever on them to avoid burns.
The Benchtops
The benchtops are Caesarstone engineered stone in the colour “Fresh Concrete”. While it looks mostly white in pictures, it’s actually a pale grey with flecks of darker grey and streaks of white. I’m not sure I can even say how much I love it, I still find myself patting the bench, it just feels really nice. I know, it’s creepy but it’s true.
The back bench is the 25mm thickness, and for the island, they added 50mm mitred edges to make it look thicker.
And the island really is as enormous as it looks, it took four guys to carry it in and lift it into place. So far it has proven to be awesome for shooting photos for tutorials. You can check it out in my floral and watercolour bunny cake tutorial. The stone isn’t super shiny like marble or smoother engineered stones, so I don’t get much reflection in my photos.
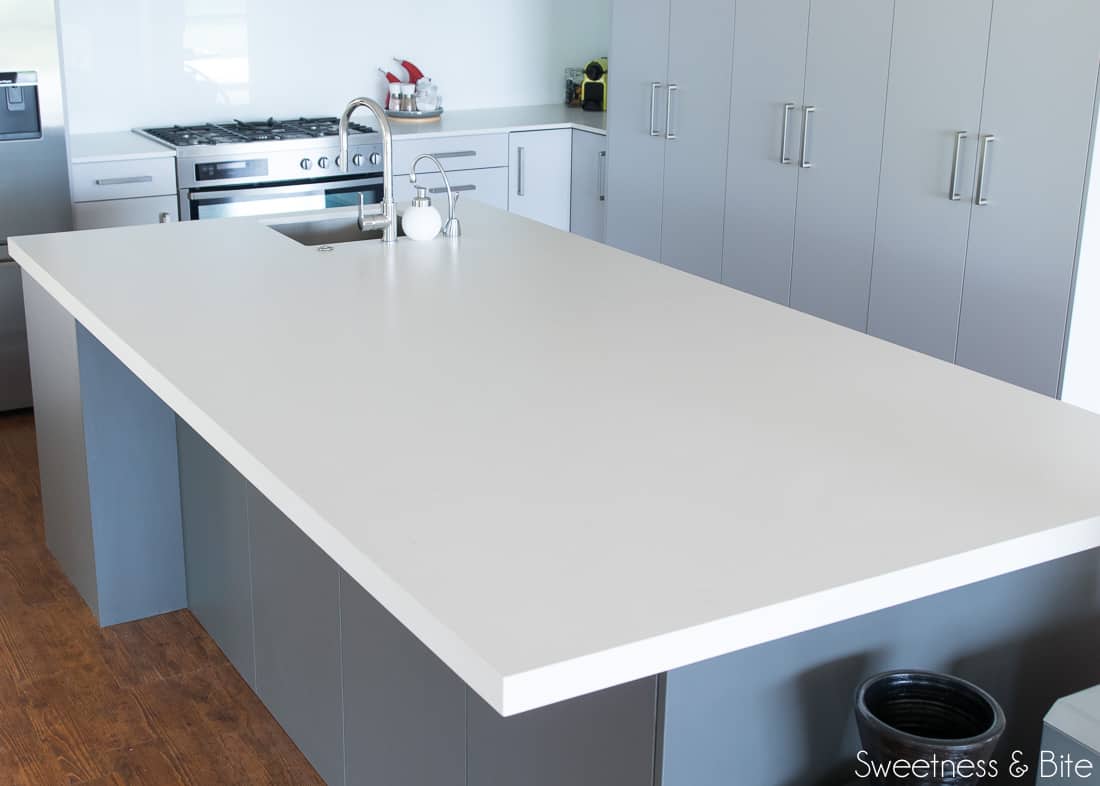
I do have to be a bit careful with it though, as it is apparently more prone to staining than a shiny-surfaced stone would be. So colouring fondant with gel colours directly onto the bench isn’t a good idea, but that’s not too much of an issue for me as I have a non-stick work board that I usually use to colour fondant anyway. So far, there haven’t been any stains on the bench that haven’t come off with a good scrub, or a dab of isopropyl alcohol on a paper towel.
The only thing that has bothered us about the bench (well, mainly me) is that it’s a little bit too high for me, so when it comes to kneading or rolling fondant I find it a bit hard. It’s standard height, but I’m only 5’2, so I can’t quite get all my body weight to help me knead and roll.
But that is compared to the kitchen in our old house, where I had a cake bench that was installed at the exact right height for me (about 10cm lower than the standard bench height). The guys that installed that kitchen held the bench up for me while I pretended to roll out fondant, so we could get it the right height. But in this kitchen, the bench kinda needed to be the average height for average-height people, so I might just have to get a little stool or something for fondant work so it’s a bit easier.
The Splashback
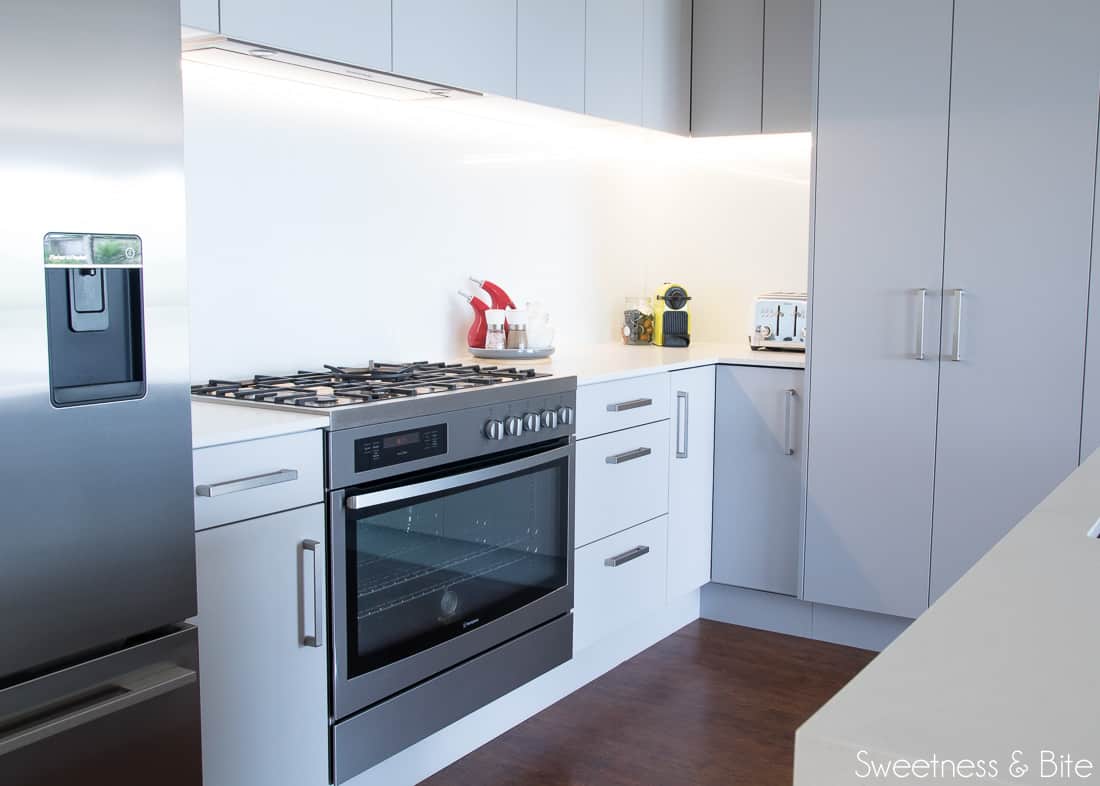
The splashback is white with a tiny little reflective sparkle in it. I went full only-child bossy b*tch and insisted we have a plain splashback because we had a bright green one in our old kitchen (Mum’s idea, and it did look really cool) but it was awful when I tried to take photos for the blog on the stovetop, as everything was tinted green. I once tried to take photos of the stages of making caramel, and it ended up looking like green slime.
An unexpected but delightful bonus of having the plain white was that you can actually see the view from the opposite sliding doors in the reflection on the splashback.
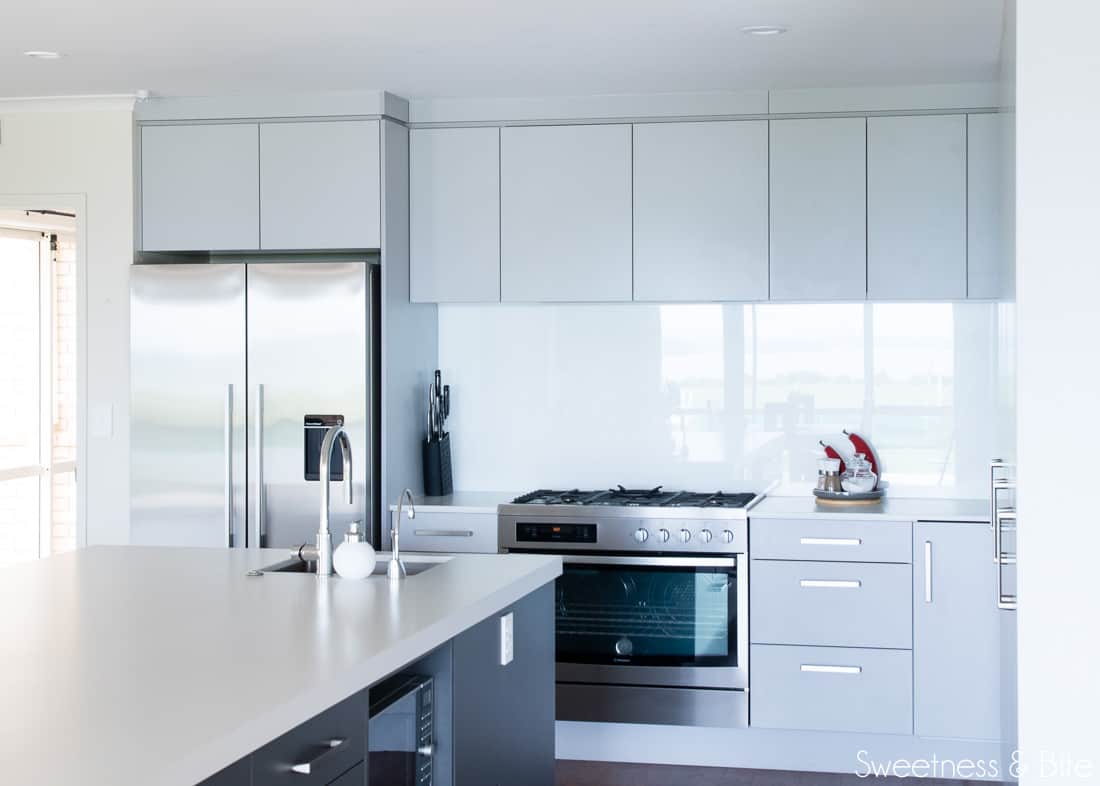
The electricians also installed these cool LED strip lights along the underside of the cupboards against the glass, which are extra handy since the toaster-corner can be a bit dark.
Ok so let’s talk about my favourite bit!
🎉 My Cake Pantry 🎉
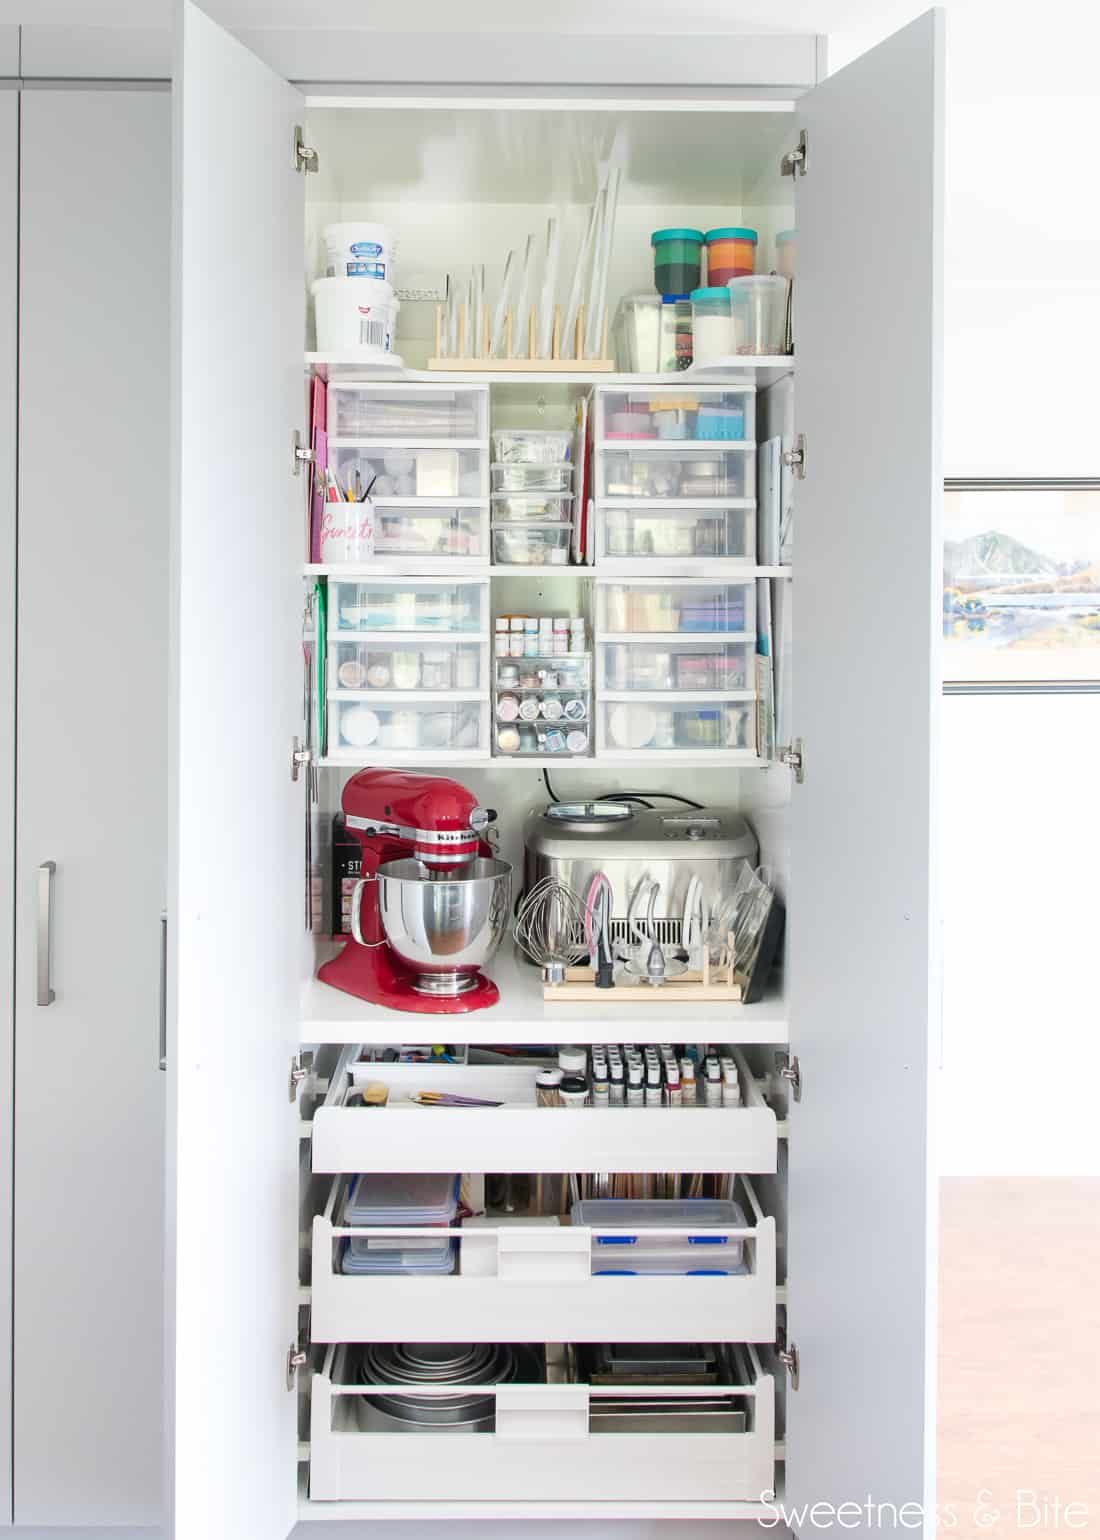
When we were initially discussing kitchens, the plan was that I wouldn’t have my cake stuff in there at all and that I would be storing it in my “studio” which is just off the kitchen. Then we thought that since there would be so much storage on the side of the island, I could use some of that for actual baking stuff like cake pans etc. and I would just keep my decorating stuff in the studio.
The original plan for the three pantries along the wall was that one would be for food, one for appliances, and one for crockery. Once everything was all installed and we looked at it, because of the little overhang/breakfast bar, those cupboards under the island were a little less accessible for frequently used baking stuff. So we decided that I would use what was intended to be the appliance pantry as a cake pantry, and we would keep the appliances (most of which we don’t use very often) in the island cupboards. I also decided to keep my ice cream maker in the cake cupboard as it weighs a ton and also there is a power point in the cupboard so I can just leave the machine in there when it’s going.
It took me a couple of weeks and a few trips to our local Storage Box store for plastic drawers and dividers, but now all of my cake decorating stuff is organised and easily accessible. I assumed I would eventually add some labels to the drawers, but so far I actually seem to just remember where everything is (an amazing feat for me, with my generally terrible memory!). I may still do the labels though for the times when I’m mid-cake and have to yell out for someone to grab something for me.
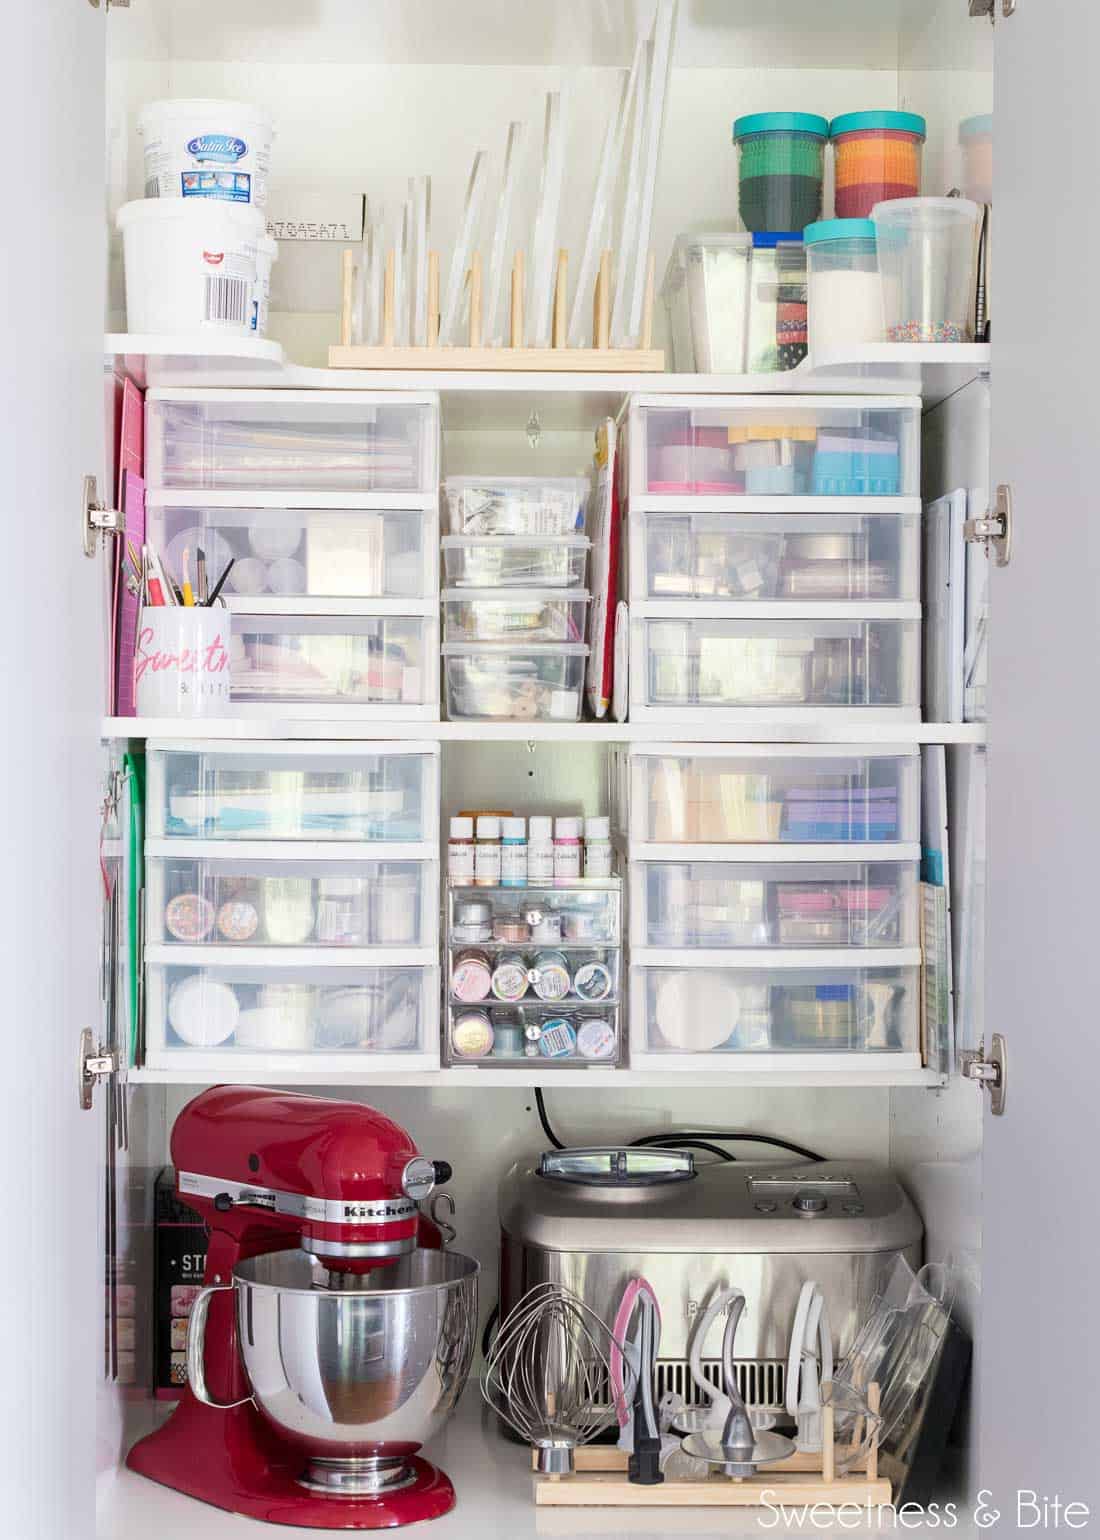
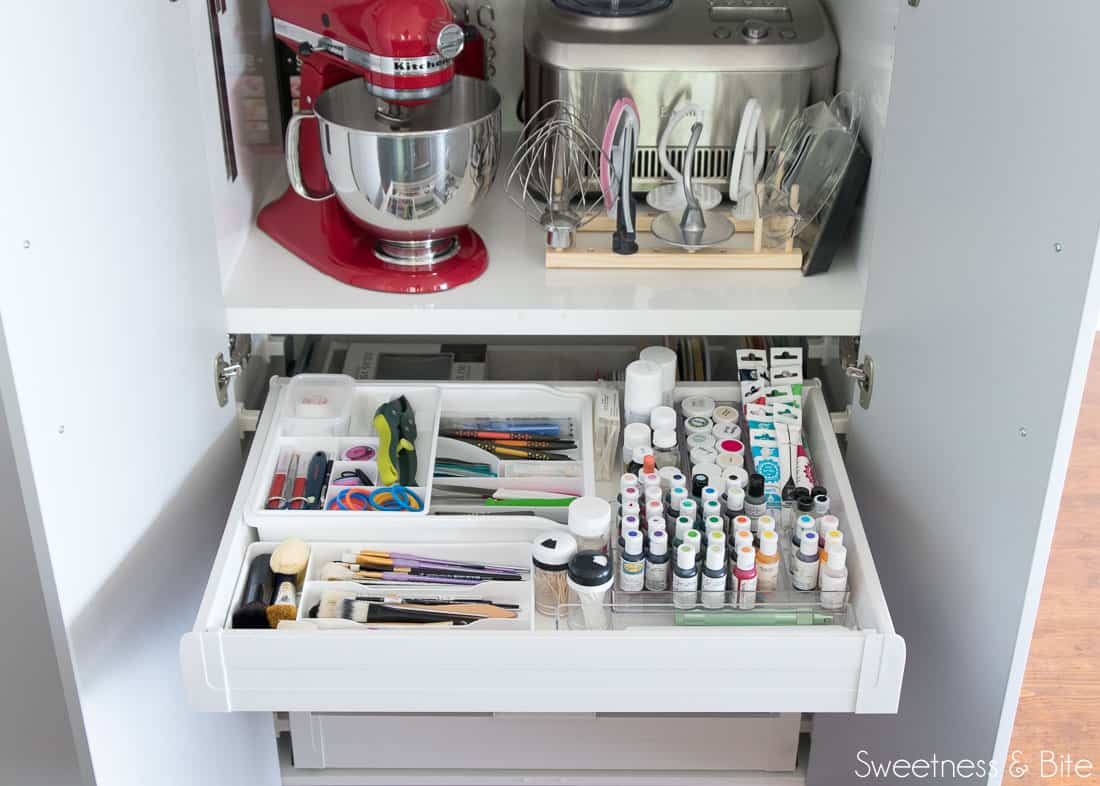
My ganache boards reside on the top shelf, organised with a handy wooden plate rack. And speaking of plate racks, I made a stand mixer attachment holder from one, which I have a tutorial for right here.
In the drawers at the bottom of the pantry, I have all my gel and candy colourings in the top drawer, along with my paintbrushes, and sugar shapers, knives, scalpels and other miscellaneous cake decorating whatnots.
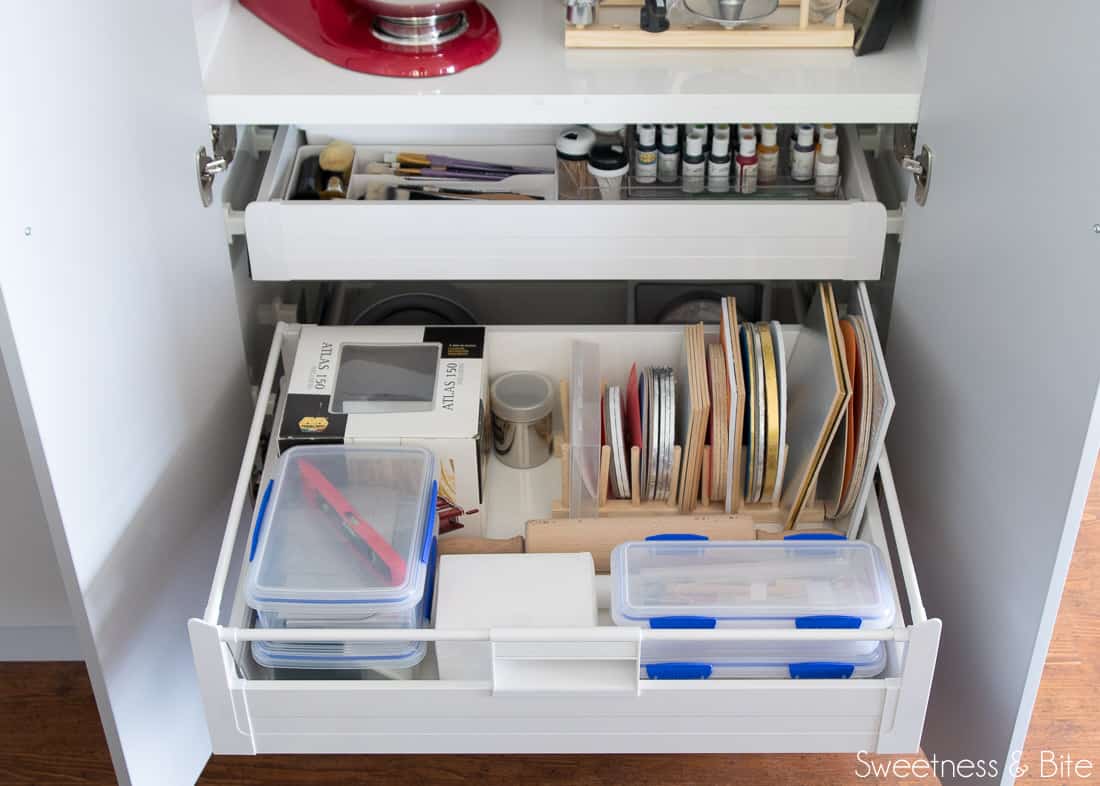
Then in the next drawer, I have my cake cards, pasta machine, ganache and fondant tools, dowels and rolling pins.
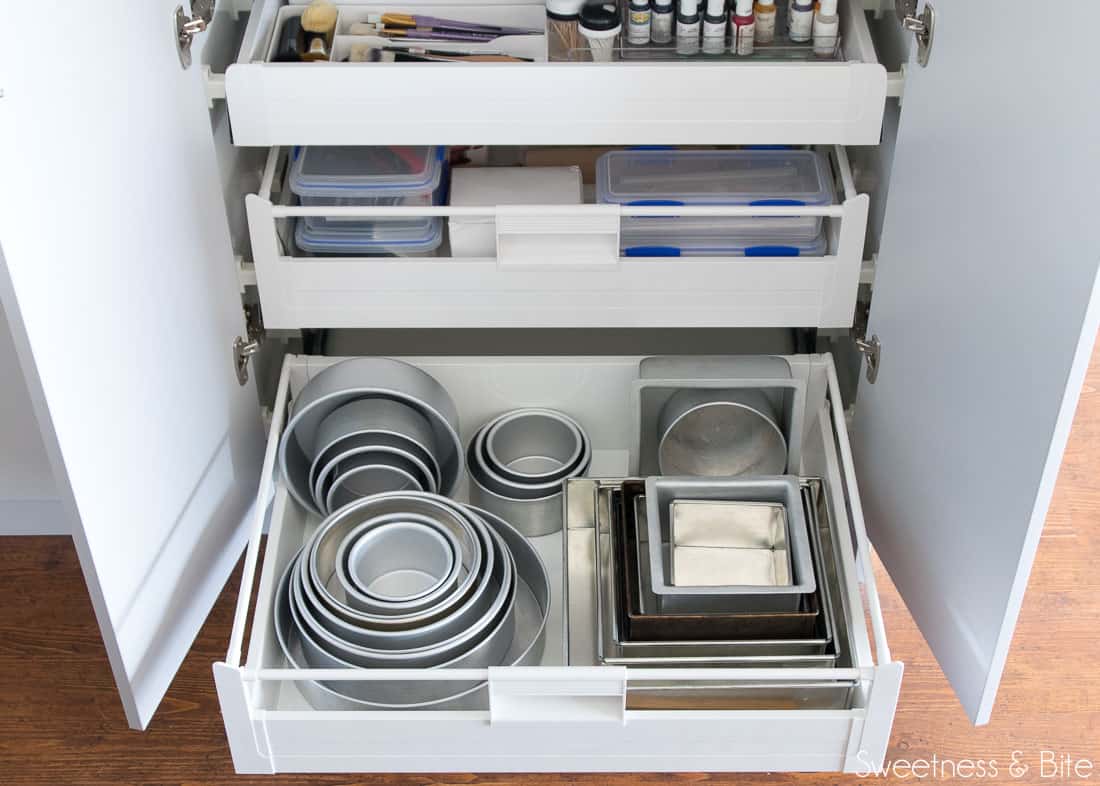
And then down the bottom, I have my round and square baking pans (and I now also just pop my turntable on top of the round cake pans, because it’s convenient).
I still have a few things I’d like to add and tweak in the way of cake pantry organisation, and every now and then I think “hmm, maybe keeping this thing right here isn’t the best”, but I’ll just tinker away with it over time.
The thing I love most about this cupboard is that I can literally just spin round from working at the bench to grab anything I need from the pantry, and it’s all easy to find. After spending years having to go to between the kitchen and the spare bedroom where all my cake stuff was stored, having it so easily accessible is a bit of a treat.
So there you have it, next time you see one of my new recipes or tutorials, you’ll know exactly where it was created.
Just don’t go imagining me in the kitchen, because to make it accurate you’ll have to imagine me in my pyjamas, and that’s maybe getting right back to that peering in windows business I was trying to discourage at the start of this post.
Kitchen Credits
These are some of the folk responsible for putting together this awesome kitchen!
Design: Christine Dawson – Mastercraft Kitchens Tauranga
Cabinetry Installation: Dan from Mastercraft
Electrical Work: Ethan and Nathan from MacMurdo Electrical
Benchtops: A1 Benchworx
Splashback: Glass Art
Plumbing: Plumber Man
Appliances: Appliance Plus Tauranga
